SinterPixels Demos Part 5: A Tiling with Rotatable Square Tiles
My new app, SinterPixels, is in the App Store. For the fifth installment in the series of examples of what one can do with SinterPixels, I’ll show how simple it can be to use SinterPixels’ “layer” object to make a tiling. Here’s what will be produced by a 19 line script:
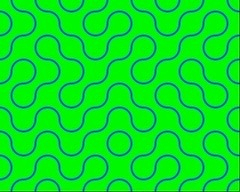
This image is a 8 by 10 array of tiles, each of which is a square 48 pixels. Each tile looks like this:
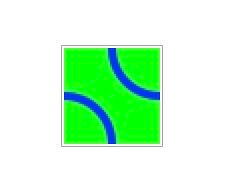
This is the script that makes this 48 by 48 pixel image in a document of its own, and makes a copy of its data in PNG format:
tell application “SinterPixels”
set tileDoc to make new document with properties {name:“Tile”, height:48, width:48}
tell tileDoc
set color of every pixel to green
make new circle with properties {position:{24, 24}, radius:24, color:blue, fill color:clear, line width:4}
make new circle with properties {position:{-24, -24}, radius:24, color:blue, fill color:clear, line width:4}
set tilePNG to get PNG data
end tell
end tell
Then we make a second document for assembling the 80 tiles that will make the pattern:
tell application “SinterPixels”
set mosaicDoc to make new document with properties {name:“Mosaic”, height:384, width:480}
end tell
Now we go through a double loop, 10 times horizontally for x, and 8 times vertically for y. Each time through the loop, the script makes a new layer with the PNG data we copied in the first step. A “layer” in SInterPixels might be different from the “layer” some might be familiar with from an app like Photoshop. In this case, the layer itself has a size of 48 by 48, and like any other shape, one can set its position and rotation. So, for each iteration, the tile (i.e., the layer) gets put in the right position, and, randomly, a rotation is applied.
tell application “SinterPixels”
b> new document with properties {name:“Mosaic”, height:384, width:480}repeat with x from 1 to 10
repeat with y from 1 to 8
set newPosition to {(x * 48) - 264, (y * 48) - 216}
set newRotation to some item of {0, 90}
tell mosaicDoc
set nthLayer to make new layer with properties {image data:tilePNG, rotation:newRotation, position:newPosition}
end tell
end repeat
end repeat
end tell
Here’s the whole whole 19 line script that makes an image like the one at the top of this post.
tell application “SinterPixels”
set tileDoc to make new document with properties {name:“Tile”, height:48, width:48}
tell tileDoc
set color of every pixel to green
make new circle with properties {position:{24, 24}, radius:24, color:blue, fill color:clear, line width:4}
make new circle with properties {position:{-24, -24}, radius:24, color:blue, fill color:clear, line width:4}
set tilePNG to get PNG data
end tell
set mosaicDoc to make new document with properties {name:“Mosaic”, height:384, width:480}
repeat with x from 1 to 10
repeat with y from 1 to 8
set newPosition to {(x * 48) - 264, (y * 48) - 216}
set newRotation to some item of {0, 90}
tell mosaicDoc
set nthLayer to make new layer with properties {image data:tilePNG, rotation:newRotation, position:newPosition}
end tell
end repeat
end repeat
end tell