-
A preliminary swift package for scripting SinterPixels: github.com/olofhellm…
Example code is in a different repo: github.com/olofhellm…Extensions
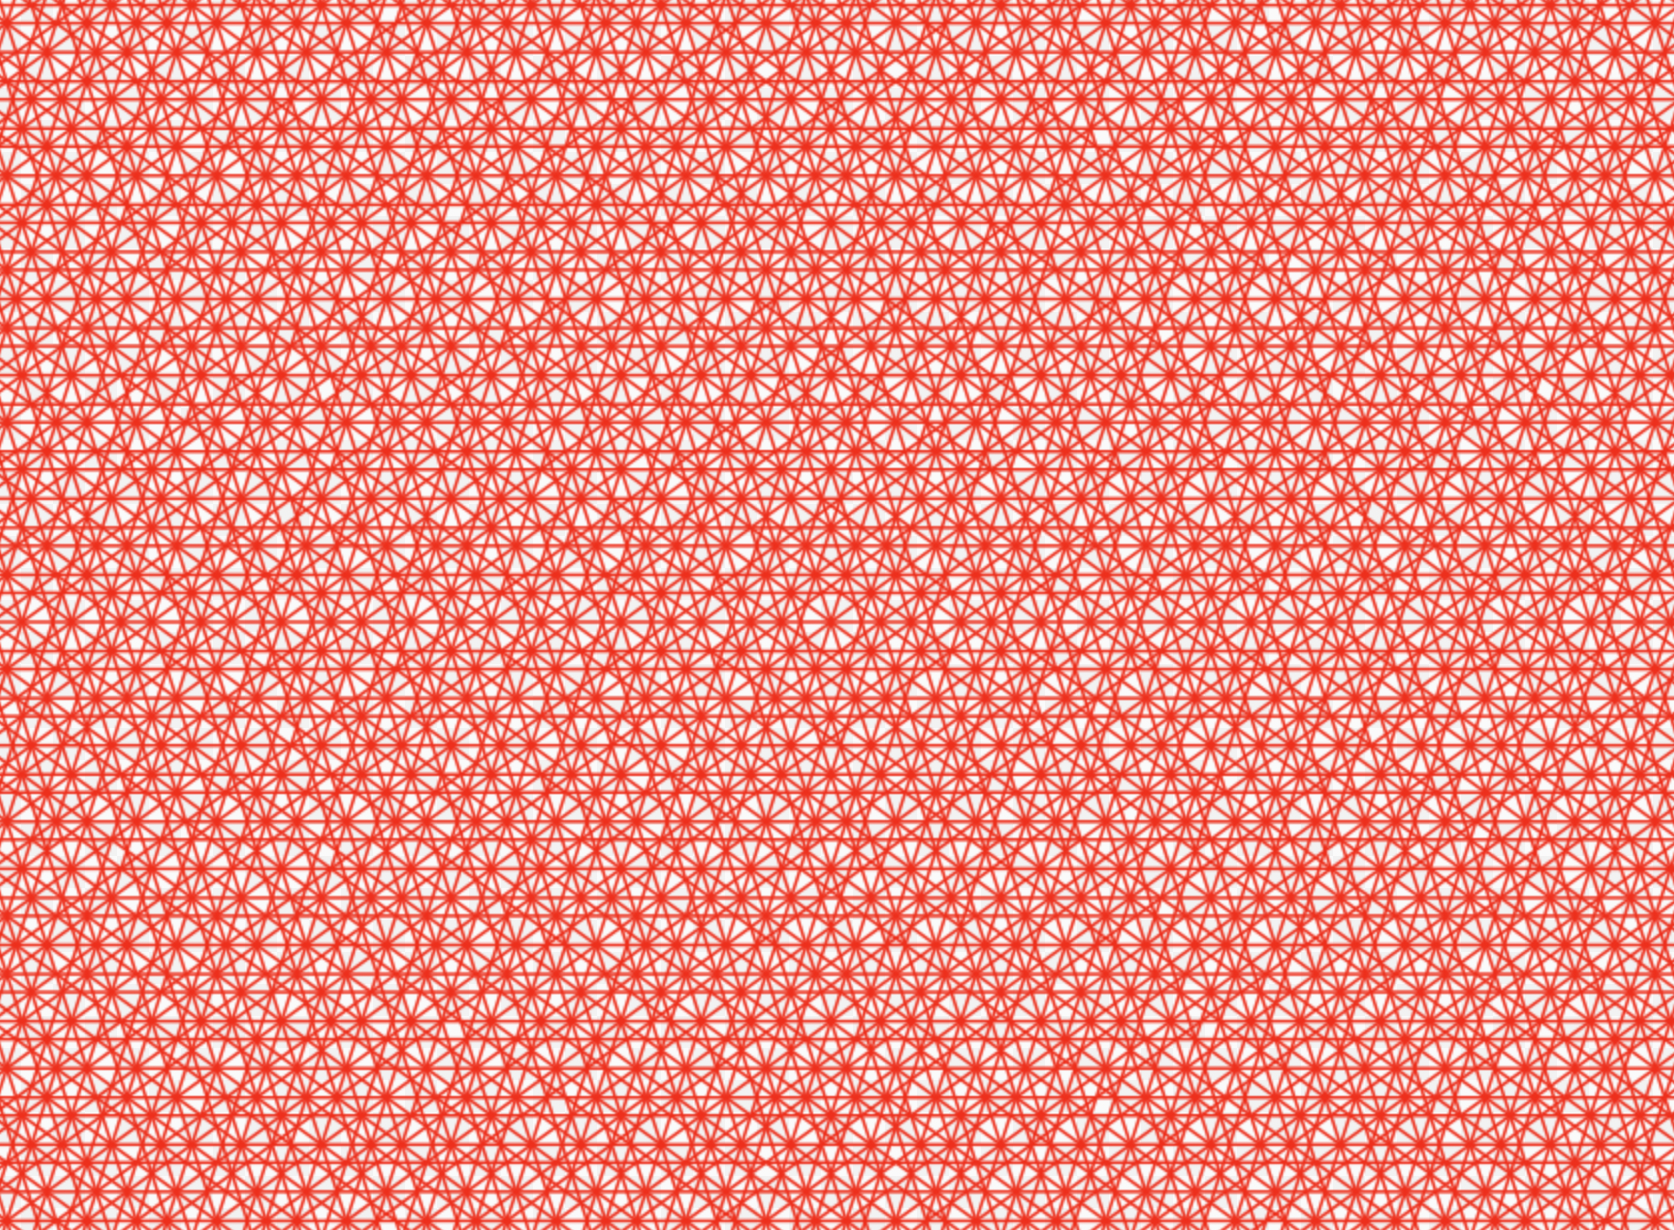
The first example produces this image:
-
SinterPixels Examples: Blue flowers
SinterPixels is in the app store! Todays example is some simple blue flowers:
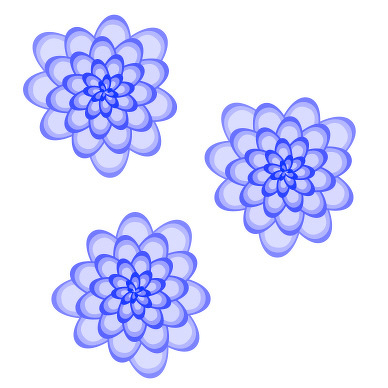
Here’s the script that generates the image:
to petalPath(len, ang, spread) using terms from application "SinterPixels" set angRadians to ang * 3.141 / 180 set p1 to {position:{0, 0}, tangent:ang + spread} set p2 to {position:{radius:len, angle:angRadians}, tangent:ang - 90} set p3 to {position:{0, 0}, tangent:ang + 180 - spread} return {pts:{p1, p2, p3}} end using terms from end petalPath to makeAPetal(circlePos, ang, len) set petalBorderDataA to petalPath(len, ang, 100) set petalBorderDataB to petalPath(len - 5, ang, 60) set petalBorderDataC to petalPath(len - 10, ang, 20) set f to 1.0 - (len / 200) set fca to {1.0 - f, 1.0 - f, 1.0} set fcb to {1.0 - (f * 0.6), 1.0 - (f * 0.6), 1.0} set fcc to {1.0 - (f * 0.3), 1.0 - (f * 0.3), 1.0} tell application "SinterPixels" tell document 1 make new path with properties {fill color:fca, line width:0, position:circlePos, closed:false, anchor data:pts of petalBorderDataA} make new path with properties {fill color:fcb, line width:0, position:circlePos, closed:false, anchor data:pts of petalBorderDataB} make new path with properties {fill color:fcc, line width:0, position:circlePos, closed:false, anchor data:pts of petalBorderDataC} end tell end tell end makeAPetal to makeAFlower(circlePos) tell application "SinterPixels" tell document 1 set centerCircle to make new circle with properties {position:circlePos, fill color:blue, radius:3, line width:0} end tell end tell set allAngles to {} repeat with a from 1 to 36 set allAngles to allAngles & {a * 10} end repeat set ang to some item of allAngles repeat with n from 1 to 42 makeAPetal(circlePos, ang + 132 * n, 90 - 2 * n) end repeat end makeAFlower makeAFlower({130, 20}) makeAFlower({-50, 100}) makeAFlower({-20, -100}) -
SinterPixels Demos: Two Tone Hexagonal Tiling
Building on the previous post, here’s a two tone hexagonal tiling, and the 42 line script that makes the tiling and the movie:
tell application "SinterPixels" set tileDoc to make new document with properties {name:"Tile", height:60, width:60} tell tileDoc make new polygon with properties {position:{0, 0}, vertex count:6, radius:30, rotation:0, line width:0, closed:false, fill color:{0.5, 1.0, 0.5, 1.0}} make new polygon with properties {position:{0, 0}, vertex:{{-31, -31}, {0, -31}, {0, 31}, {-31, 31}}, fill color:{0.5, 0.5, 1.0, 1.0}, line width:0, blend mode:sourceIn} make new circle with properties {position:{30, 0}, radius:14.1, color:blue, fill color:{0.5, 0.5, 1.0, 1.0}, line width:4, blend mode:sourceIn} make new circle with properties {position:{-30, 0}, radius:14.1, color:blue, fill color:{0.5, 1.0, 0.5, 1.0}, line width:4, blend mode:sourceIn} make new polygon with properties {vertex:{{0, -30}, {0, 30}}, position:{0, 0}, line width:4, closed:false, color:blue, fill color:clear, blend mode:sourceIn} set tilePNG to get PNG data end tell set mosaicDoc to make new document with properties {name:"Mosaic", height:450, width:600} repeat with x from 1 to 11 repeat with y from 1 to 5 set newPosition to {(x * 52) - 321, ((2 * y) * 45) - 285} set newRotation to some item of {30, 150, 270} tell mosaicDoc set nthLayer to make new layer with properties {image data:tilePNG, rotation:newRotation, position:newPosition} end tell set newPosition to {(x * 52) - 295, (((2 * y) + 1) * 45) - 285} set newRotation to some item of {30, 150, 270} tell mosaicDoc set nthLayer to make new layer with properties {image data:tilePNG, rotation:newRotation, position:newPosition} end tell end repeat end repeat tell mosaicDoc start filming record movie frame repeat 15 times set y to some item of {0, 1, 2, 3, 4, 5, 6, 7, 8, 9} set x to some item of {1, 2, 3, 4, 5, 6, 7, 8, 9, 10, 11} set n to x + y * 11 set nthTile to layer n set rot to rotation of nthTile repeat with r from 1 to 60 set rotation of nthTile to rot + (r * 2) record movie frame end repeat end repeat stop filming end tell end tell -
SinterPixels Demos, Part 12: Hexagonal Tiling
Next in the series of what’s possible with SinterPixels, my new app in the macOS App Store: How to generate this hexagonal tiling:
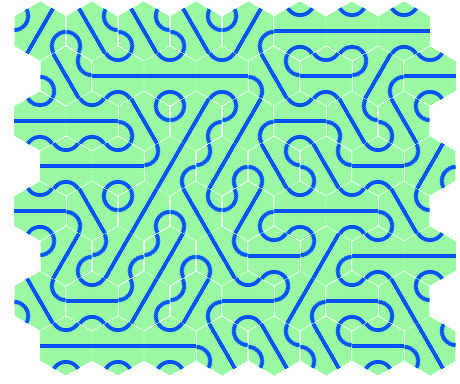
Previously, In Part 10, I showed how to make a square tiling. A square tiling is a bit easier than a hexagonal tiling, because the tiles are square, and layers are also square, so one can make a layer entirely filled with the tile. For a hexagonal tile, we have to leave part of the rectangular tile transparent, so it looks like a hexagon. That’s accomplished using the blend mode.
When using the blend mode sourceIn to create a shape, if the shape is drawn over something transparent, it doesn’t show up. So, starting with a transparent tile, first we draw a hexagon filled with an opaque color, and then we draw shapes over it using the sourceIn blend mode. This means only the parts of the shape that overlap the hexagon will be visible.
The two other differences from the square tiling script are: first – the placement of the hexagons – Instead of a square lattice, every other line is offset by 1/2 x, and the spacing in x is approximately 0.866 times the spacing in y (that’s one half of the square root of 3 ) and second – there are now three possible rotations for the tiles instead of 2.
tell application "SinterPixels"
set tileDoc to make new document with properties {name:"Tile", height:60, width:60}
tell tileDoc
make new polygon with properties {position:{0, 0}, vertex count:6, radius:30, rotation:0, line width:0, closed:false, fill color:{0.5, 1.0, 0.5, 1.0}}
make new circle with properties {position:{30, 0}, radius:14.1, color:blue, fill color:{0.5, 1.0, 0.5, 1.0}, line width:4, blend mode:sourceIn}
make new circle with properties {position:{-30, 0}, radius:14.1, color:blue, fill color:{0.5, 1.0, 0.5, 1.0}, line width:4, blend mode:sourceIn}
make new polygon with properties {vertex:{{0, -30}, {0, 30}}, position:{0, 0}, line width:4, closed:false, color:blue, fill color:clear, blend mode:sourceIn}
set tilePNG to get PNG data
end tell
set mosaicDoc to make new document with properties {name:"Mosaic", height:384, width:460}
repeat with x from 1 to 8
repeat with y from 1 to 4
set newPosition to {(x * 52) - 241, ((2 * y) * 45) - 250}
set newRotation to some item of {30, 90, 150}
tell mosaicDoc
set nthLayer to make new layer with properties {image data:tilePNG, rotation:newRotation, position:newPosition}
end tell
set newPosition to {(x * 52) - 215, (((2 * y) + 1) * 45) - 250}
set newRotation to some item of {30, 90, 150}
tell mosaicDoc
set nthLayer to make new layer with properties {image data:tilePNG, rotation:newRotation, position:newPosition}
end tell
end repeat
end repeat
end tell
-
SinterPixels Demos Part 11: Stained Glass Reveal
For the last in this initial series of examples of what you can do with SinterPixels, we’ll make an animation of drawing this stained glass window from the Grande Museo del Duomo in Milan.
We start with a picture of the stained glass, then set the alpha of every pixel to 0, so it starts off looking like a blank canvas. Then, we’ll progressively set the alpha of each pixel higher to reveal the image.
We’ll start with just three pixels, gradually making them opaque. When a pixel becomes opaque, it “activates” its neighbors. The rate at which a pixel becomes opaque is proportional to its “darkness”. This leads to the effect where the dark bands of the window appear first, and the lighter interiors of each pane become opaque more slowly.
To manage the list of activated pixels, the demo uses JapaScript in stead of AppleScript, as JavaScript has built in Array and Map types, which AppleScript doesn’t have built in (although, similar capabilities are accessible using the AppleScript ObjectiveC feature, with the NSMutableArray and NSMutableDictionary types).
Most of the script is just looping through the ‘growing pixels’ list, gradually setting the alpha of those pixels to larger values.
The script in its entirety is below: The prerequisite is to load an image and set the name to “reference”, so that the script can refer to it. And, before starting the script, set all the alpha components to zero with this AppleScript:
tell application "SinterPixels"
	set alpha component of every pixel of document "reference" to 0.0
end tell
const SinterPixels = Application('SinterPixels'); let refDoc = SinterPixels.documents("reference") let scriptFinished = false let docWidth = refDoc.width() let docHeight = refDoc.height() let darknessDict = new Map(); let growthRateDict = new Map(); let activationDict = new Map(); let alphaDict = new Map(); class pixelCoord { constructor(x, y) { this.x = x; this.y = y; } } function getDarknessFromColor(refColor) { let re = refColor.redComponent let gr = refColor.greenComponent let bl = refColor.blueComponent return (1.0 - ((re + gr + bl) / 3.0)) } function arrayIndexFor(pix) { let ai = pix.x + pix.y * docWidth return ai } function setDarkness(pix, drk) { let arrayIndex = arrayIndexFor(pix) darknessDict.set(arrayIndex, drk) } function getDarkness(pix) { let arrayIndex = arrayIndexFor(pix) let drk = darknessDict.get(arrayIndex) return drk } function setGrowthRate(pix, gr) { let arrayIndex = arrayIndexFor(pix) growthRateDict.set(arrayIndex, gr) } function getGrowthRate(pix) { let arrayIndex = arrayIndexFor(pix) let gr = growthRateDict.get(arrayIndex) return gr } function setActivationVal(pix, av) { let arrayIndex = arrayIndexFor(pix) activationDict.set(arrayIndex, av) } function getActivationVal(pix) { let arrayIndex= arrayIndexFor(pix) let av = activationDict.get(arrayIndex) return av } function canBeActivated(pix) { let av = getActivationVal(pix) let canBe = av == 0 return canBe } function isActivated(pix) { let av = getActivationVal(pix) let isAct = av == 1 return isAct } function setActivated(pix) { setActivationVal(pix, 1) } function markPixelDone(pix) { setActivationVal(pix, 2) } function isPixelDone(pix) { let av = getActivationVal(pix) let isDone = av == 2 return isDone } function setAlphaDictOnly(pix, newAlpha) { let arrayIndex = arrayIndexFor(pix) alphaDict.set(arrayIndex, newAlpha) } function setPixAlpha(pix, newAlpha) { let newAlf = newAlpha if (newAlpha > 1.0) { newAlf = 1.0 } let arrayIndex = arrayIndexFor(pix) alphaDict.set(arrayIndex, newAlf) refDoc.rows[pix.y].pixels[pix.x].alphaComponent = newAlpha return newAlf == 1.0 } function getPixAlpha(pix) { let arrayIndex = arrayIndexFor(pix) let alf = alphaDict.get(arrayIndex) return alf } function addRate(pix, rate) { let oldRate = getGrowthRate(pix) let newGrowthRate = oldRate + rate setGrowthRate(pix, newGrowthRate) } function activatePixel(pix, rate) { let av = getActivationVal(pix) if (av == 1) { addRate(pix, rate) return false } else if (av == 0) { let darkness = getDarkness(pix) setActivated(pix) addRate(pix, rate + darkness) return true } } function activatePixels(activationList) { for (const activationListItem in activationList) { let pix = activationListItem[0] let rate = activationListItem[1] let darkness = getDarkness(pix) activatePixel(pix, rate + darkness) } } function initializePixels() { let pixArray = new Array(); let pixa = new pixelCoord(20,docHeight - 2) let halfx = Math.trunc(docWidth / 2) let pixb = new pixelCoord(halfx, docHeight - 2) let pixc = new pixelCoord(docWidth - 20, docHeight - 2) pixArray.push(pixa) pixArray.push(pixb) pixArray.push(pixc) activatePixel(pixa, 0.5) activatePixel(pixb, 0.5) activatePixel(pixc, 0.5) return pixArray } function growPixel(pix) { if (pixExists(pix) == false) { return false } let gr = getGrowthRate(pix) let pa = getPixAlpha(pix) let newAlpha = pa + gr let setPixResult = setPixAlpha(pix, newAlpha) return setPixResult } function pixExists(pix) { let xc = pix.x let yc = pix.y return (xc >= 0) && (yc >= 0) && (xc < (docWidth)) && (yc < (docHeight)) } function addCoords(pix, dx, dy) { let newx = pix.x + dx let newy = pix.y + dy return [newx, newy] } function activateNeighbors(pix) { let darkness = getDarkness(pix) let newlyActive = new Array() let nnDeltas = [[1, 0], [0, 1], [-1, 0], [0, -1]] let diagonalDeltas = [[1, 1], [-1, 1], [-1, -1], [1, -1]] let nndCount = nnDeltas.length for (let nndi = 0; nndi<nndCount ; ++ nndi) { let nnd = nnDeltas[nndi] let newCoords = addCoords(pix, nnd[0], nnd[1]) let newPix = new pixelCoord(newCoords[0], newCoords[1]) if (pixExists(newPix)) { let activated = activatePixel(newPix, darkness * darkness * 0.08) if (activated) { newlyActive.push(newPix) } } } let ddCount = diagonalDeltas.length for (let ddi = 0; ddi <ddCount ; ++ ddi) { let dd = diagonalDeltas[ddi] let diagCoords = addCoords(pix, dd[0], dd[1]) let diagPix = new pixelCoord(diagCoords[0], diagCoords[1]) if (pixExists(diagPix)) { let activated = activatePixel(diagPix, darkness * darkness * 0.05) if (activated) { newlyActive.push(diagPix) } } } return newlyActive } function initRefDoc() { for (let y = 0; y < docHeight; ++y) { for (let x = 0; x < docWidth; ++x) { refDoc.rows[y].pixels[x].alphaComponent = 0.0 } } } function initData() { for (let yc = 0; yc < docHeight; ++yc) { let rowRefColors = refDoc.rows[yc].pixels.color() ; for (let xc = 0; xc < docWidth; ++xc) { let darkness = getDarknessFromColor(rowRefColors[xc]) let pix = new pixelCoord(xc, yc) setDarkness(pix, darkness) setGrowthRate(pix, 0.0) setAlphaDictOnly(pix, 0.0) setActivationVal(pix, 0) } } } function run () { initData() let growingPixels = initializePixels() refDoc.filming.start() while (scriptFinished == false) { let donePixels = new Array() let nextGrowingPixels = new Array() let gpCount = growingPixels.length for (let gpn = 0; gpn<gpCount; ++gpn) { let gp = growingPixels[gpn] let gpDone = growPixel(gp) if (gpDone) { donePixels.push(gp) } else { nextGrowingPixels.push(gp) } } let dpCount = donePixels.length for (let dpn = 0; dpn < dpCount; ++dpn ) { let dp = donePixels[dpn] let activatedPixels = activateNeighbors(dp) let anCount = activatedPixels.length for (let ani = 0 ; ani < anCount; ++ani) { let ap = activatedPixels[ani] } if (activatedPixels.length > 0) { nextGrowingPixels.push(...activatedPixels) } markPixelDone(dp) } refDoc.recordMovieFrame() growingPixels = nextGrowingPixels scriptFinished = growingPixels.length == 0 } refDoc.filming.stop({filename: "Fin.mov"}) } -
SinterPixels Demo Part 10: Rotating Tiles Movie
Back in part 5 of my series on SinterPixels demos: I showed how to make a grid by repeating this tile:
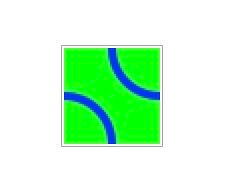 to make: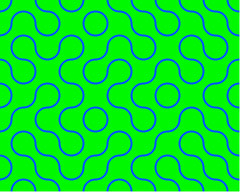
SinterPixels is great at making images like that, but SinterPixels is unique in how it generates movies. So after generating a grid like that, its easy to go ahead and generate a movie like this:
In the script, we just select a random tile and spin it by 90 degrees, saving a movie frame every 2 degrees. Here’s the script to generate the movie (prerequisite: make the grid as shown in the post here
tell application "SinterPixels"
tell document 1
start filming
record movie frame
repeat 10 times
set y to some item of {0, 1, 2, 3, 4, 5, 6, 7}
set x to some item of {1, 2, 3, 4, 5, 6, 7, 8, 9, 10}
set n to x + y * 10
set nthTile to layer n
set rot to rotation of nthTile
repeat with r from 1 to 45
set rotation of nthTile to rot + (r * 2)
record movie frame
end repeat
end repeat
stop filming
end tell
end tell
-
SinterPixels Demos Part 9: Circle Spiral
Here’s another example of a twirl kind of shape that is extremely easy to generate.
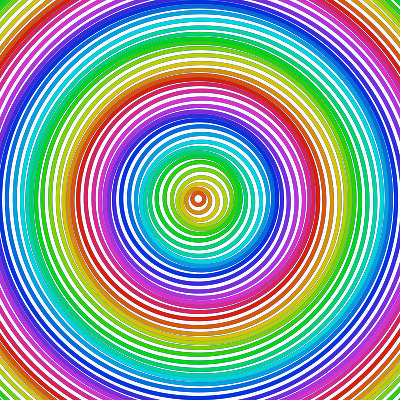
This image is just 50 circles. The trick to getting the spiral shape is to offset the position in both x and y by a cosine function as the circles get larger.
The color is set with an HSB color, also varying as the circles get larger. The script itself is only 12 lines ling:
on cos(x)
return run script "Math.cos(" & x & ")" in "JavaScript"
end cos
tell application "SinterPixels"
set doc1 to make new document with properties {height:400, width:400}
repeat with a from 1 to 50
set px to my cos(a + 1.57)
set py to my cos(a)
set hsbColor to {hue:a * 0.05, saturation:1.0, brightness:0.8}
make new circle at beginning of doc1 with properties {position:{2 * px, 2 * py}, radius:a * 6, color:hsbColor, fill color:clear, line width:4}
end repeat
end tell
-
SinterPixels Demos Part 8: Color Spirals
Next up in examples of what you can do with SinterPixels, my new app in the macOS App Store: Using radial coordinates and HSB colors!
In SinterPixels, it’s possible to specify positions using radial coordinates – that is, an angle and a radius, instead of using x and y coordinates. That means it’s easy to make a radial shape like this spiral. It is also possible to specify colors using HSB values (as opposed to RGB, which also makes it easy to apply colors around a circle like in a color wheel – that’s the H (“Hue”) component of HSB.
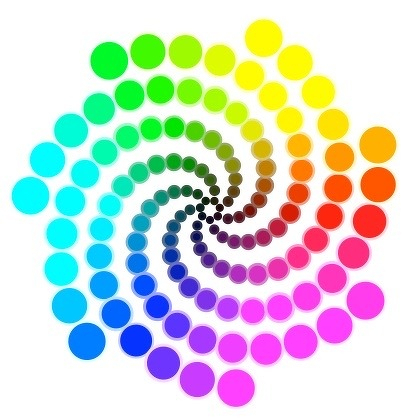
Here’s the script that generates this image. Changing the parameters like numSpirals and twirliness produce different shapes. Have fun exploring!
set numSpirals to 7
set twoPi to 6.283
set twirliness to 2.2
set spiralLength to 18
set shellThickness to 10
tell application "SinterPixels"
set newDoc to make new document with properties {height:420, width:420}
tell newDoc
repeat with radLoop from 1 to spiralLength
set rad to shellThickness * radLoop
repeat with angleLoop from 1 to numSpirals
set ang to angleLoop * twoPi / numSpirals + radLoop * (twirliness / shellThickness)
set h to (ang / twoPi)
set b to (radLoop / shellThickness)
set aColor to {hue:h, saturation:1.0, brightness:b}
set bColor to {hue:h, saturation:0.5, brightness:b}
set c1 to make new circle with properties {fill color:aColor, color:bColor, radius:radLoop + 2, position:{angle:ang, radius:rad}}
end repeat
end repeat
end tell
end tell
-
SinterPixels Demos Part 7: Karaoke Video
Next up in examples of what you can do with SinterPixels, my new app in the macOS App Store: making a Karaoke Video:
This is a pretty involved script – by far the longest so far in our suite of examples. But it does a lot! It has to layout the text on the screen, apply color to the right word at the right time, fade in the new text at the right time, etc. However, it is easy enough to understand, so you can make your own karaoke videos without tinkering too much with this script. You could just replace the words and timing data in the first line, and it might word just fine if the lines for your song aren’t too long!
First, we need to have the words of the song in the script, and also we need to know how long each word should be highlighted on the screen. That’s captured in this first statement:
set allLines to { { {"Take", "me", "out", "to", "the", "ball", "game"}, {2, 1, 1, 1, 1, 3, 3} }, ¬
{ {"Take", "me", "out", "with", "the", "crowd"}, {2, 1, 1, 1, 1, 6} }, ¬
{ {"Buy", "me", "some", "pea", ".nuts", "and", "crack", ".er", "jack"}, {1, 1, 1, 1, 1, 1, 2, 1, 3} }, ¬
{ {"I", "don't", "care", "if", "I", "ev", ".er", "get", "back"}, {2, 1, 1, 1, 1, 1, 1, 1, 1} }, ¬
{ {"'cause", "it's", "root", "root", "root", "for", "the", "Phil", ".lies"}, {1, 1, 2, 1, 1, 1, 1, 3, 2} }, ¬
{ {"If", "they", "don't", "win", "it's", "a", "shame"}, {1, 2, 1, 1, 1, 1, 4} }, ¬
{ {"For", "it's", "1", "2", "3", "strikes", "you're", "out"}, {1, 1, 3, 3, 1, 1, 1, 1} }, ¬
{ {"at", "the", "old", "ball", "game"}, {1, 1, 3, 3, 6} } }
Here we have a list of eight items. each item is a pair of lists – a list of “words” and a list of durations for each word. If you look carefully, not all of the words are words. In the case we have a two-syllable word, like “peanuts”, we want the two syllable highlighted separately, so we make it two entries – “pea” and “.nuts” The period in from of “nuts” is the signal to ourselves that we don’t want a space between “pea” and “nuts” in the layout.
In the list of durations, a 1 corresponds to a quarter note, 2 to a half note, etc. “Take Me Out to The Ball Game” is in 3/4 time, so a line of 4 bars generally adds up to 12, but in a few verses, the next line begins before the 4 bars finish, so that isn’t always the case.
One of our helper functions is durationOfLine(karaokeLine). In this case, karaokeLine is the pair of list of words and list of durations. This function just adds up the durations:
to durationOfLine(karaokeLine)
set ticks to item 2 of karaokeLine
set lineDuration to 0
repeat with t in ticks
set lineDuration to lineDuration + t
end repeat
return lineDuration
end durationOfLine
Another helper function is removeFirstCharOf(str). This one is useful to pull that leading period off of a string like “.nuts”
to removeFirstCharOf(str)
set newString to (characters 2 thru -1 of str) as string
return newString
end removeFirstCharOf
An important helper function is lineLayout(karaokeLine, yPos, theDoc, wordColor) This function creates and returns a list of text shape objects at the given y coordinate. Each text shape has the right x coordinate, allowing for spaces between the words.
to layoutLine(karaokeLine, yPos, theDoc, wordColor)
set wds to item 1 of karaokeLine
set lineLayout to {}
set specialWordIDs to {}
set totalSize to 0
repeat with wthText in wds
set isSpecial to wthText begins with "."
if isSpecial then
set additionalSpace to 0
set displayText to removeFirstCharOf(wthText)
else
set additionalSpace to 10
set displayText to wthText
end if
tell application "SinterPixels"
tell theDoc
set wthWord to make new text shape with properties {text content:displayText, position:{0, yPos}, fill color:wordColor, font size:32}
set wthSize to size of wthWord
set totalSize to totalSize + (width of wthSize) + additionalSpace
set lineLayout to lineLayout & {wthWord}
if isSpecial then
set specialWordIDs to specialWordIDs & ID of wthWord
end if
end tell
end tell
end repeat
-- now space out the words on the line
set currentx to totalSize / -2
repeat with wthWord in lineLayout
tell application "SinterPixels"
tell theDoc
if specialWordIDs does not contain ID of wthWord then
set currentx to currentx + 10
end if
set thisWidth to width of size of wthWord
set x coordinate of wthWord to (currentx + thisWidth / 2)
set currentx to currentx + thisWidth
end tell
end tell
end repeat
return lineLayout
end layoutLine
Part of the script will make the words fade in , with the helper function wax() – and make the words fade out, with the helper function fade(). The fade in and fade out is accomplished by setting the alpha of the text shapes.
to fade(wordIds, theDoc)
set remainingIDs to {}
repeat with wthId in wordIds
tell application "SinterPixels"
tell theDoc
set oldAlpha to alpha component of fill color of text shape id wthId
try
if oldAlpha > 0.06 then
set alpha component of fill color of text shape id wthId to oldAlpha - 0.04
set remainingIDs to remainingIDs & wthId
else
delete text shape id wthId
end if
end try
end tell
end tell
end repeat
return remainingIDs
end fade
to wax(waxingWordData, theDoc)
set newWaxingData to {}
repeat with nthWaxDatum in waxingWordData
set theID to shapeID of nthWaxDatum
set newAlpha to (alf of nthWaxDatum) + 0.01
if newAlpha ≥ 1.0 then
set newAlpha to 1.0
end if
if newAlpha > 0.0 then
tell application "SinterPixels"
tell theDoc
set the alpha component of fill color of shape id theID to newAlpha
end tell
end tell
end if
if newAlpha < 1.0 then
set newWaxingData to newWaxingData & { {shapeID:theID, alf:newAlpha} }
end if
end repeat
return newWaxingData
end wax
And the last helper function – fillNewWaxingWordData(waxingData, lineLayout), which sets up the text shapes so they are ready to fade in:
to fillNewWaxingWordData(waxingData, lineLayout)
set newWaxingWordData to waxingData
set wordAlpha to -1.0
repeat with nthWord in lineLayout
set newWaxingWordData to newWaxingWordData & { {shapeID:id of nthWord, alf:wordAlpha} }
set wordAlpha to wordAlpha - 0.25
end repeat
return newWaxingWordData
end fillNewWaxingWordData
Now the part of the script that puts all the pieces together. It starts a movie, proceeds to layout each line at the right time, and invokes the fade in and fade out of each text shape. When the time is right, it sets the color of one of the words to blue, and resets the previously blue word to gray Most importantly, it records each movie frame, and when the movie is complete, save the movie to a file.
set lineCount to count allLines
set fadingWordIDs to {}
set waxingWordData to {}
set lineCount to count allLines
tell application "SinterPixels"
set theDoc to make new document with properties {height:112, width:600}
tell theDoc
start filming
set numLoops to (lineCount + 1) / 2
set topLine to item 1 of allLines
set topLineLayout to my layoutLine(topLine, 28, theDoc, {0.5, 0.5, 0.5, 1.0})
set bottomLine to item 2 of allLines
set bottomLineLayout to my layoutLine(bottomLine, -28, theDoc, {0.5, 0.5, 0.5, 1.0})
repeat with nthLoop from 1 to numLoops
set nextTopLineIndex to (2 * nthLoop + 1)
if (lineCount ≥ nextTopLineIndex) then
set nextTopLine to item nextTopLineIndex of allLines
set nextTopLineLayout to my layoutLine(nextTopLine, 28, theDoc, {0.5, 0.5, 0.5, 0.0})
set waxingWordData to my fillNewWaxingWordData(waxingWordData, nextTopLineLayout)
else
set nextTopLine to {}
set nextTopLineLayout to {}
end if
set ticks to item 2 of topLine
set w to 0
repeat with wthWord in topLineLayout
set w to w + 1
set wthCount to item w of ticks
set frames to wthCount * 15
set fill color of wthWord to blue
repeat with fr from 1 to frames
record movie frame duration 1
set fadingWordIDs to my fade(fadingWordIDs, theDoc)
set waxingWordData to my wax(waxingWordData, theDoc)
end repeat
set fadingWordIDs to fadingWordIDs & ID of wthWord
set fill color of wthWord to gray
end repeat
if (nthLoop > 1) then
set bottomLine to nextBottomLine
set bottomLineLayout to nextBottomLineLayout
end if
set nextBottomLineIndex to (2 * nthLoop + 2)
if (lineCount ≥ nextBottomLineIndex) then
set nextBottomLine to item nextBottomLineIndex of allLines
set nextBottomLineLayout to my layoutLine(nextBottomLine, -28, theDoc, {0.5, 0.5, 0.5, 0.0})
set waxingWordData to my fillNewWaxingWordData(waxingWordData, nextBottomLineLayout)
else
set nextBottomLineLayout to {}
set nextBottomLine to {}
end if
set w to 0
set ticks to item 2 of bottomLine
repeat with wthWord in bottomLineLayout
set w to w + 1
set wthCount to item w of ticks
set frames to wthCount * 15
set fill color of wthWord to blue
repeat with fr from 1 to frames
record movie frame duration 1
set fadingWordIDs to my fade(fadingWordIDs, theDoc)
set waxingWordData to my wax(waxingWordData, theDoc)
end repeat
set fadingWordIDs to fadingWordIDs & ID of wthWord
set fill color of wthWord to gray
end repeat
set topLineLayout to nextTopLineLayout
set topLine to nextTopLine
end repeat
repeat with fr from 1 to 120
record movie frame duration 1
set fadingWordIDs to my fade(fadingWordIDs, theDoc)
end repeat
stop filming filename "KaraokeMovie.mov"
end tell
end tell
See the SinterPixels support [github site ](https://github.com/olofhellman/SinterpixelsSupportFiles/blob/main/docs/Karaoke.md) for additional info:Here’s the full video on YouTube:
-
SinterPixels Demos Part 6: A Parametric Equation
Next up in examples of what you can do with SinterPixels, my new app in the macOS App Store: drawing a parametric equation:
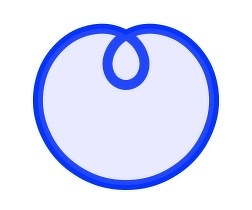
This is a curve where x and y are defined by functions of a third variable, t
x(t) = cos(3t) * sin(t)
y(t) = sin(3t) * sin(t)To draw this line, we’ll make a SinterPixels path. SinterPixels paths are defined by a set of path anchors, each of which has a position and a slope. So, to define the path, the script will step through values of t from 0 to pi, in increments of pi/18. At each of the 19 points, we’ll calculate the position of x and y, and also the slope of the function at x and y.
First let’s define helper functions to calculate sine and cosine. There aren’t built-in AppleScript versions, but its easy to call the JavaScript versions:
on sin(x)
return run script "Math.sin(" & x & ")" in "JavaScript"
end sin
on cos(x)
return run script "Math.cos(" & x & ")" in "JavaScript"
end cos
Now let’s define our function. We’ll make a coord(t) function to calculate the x and y coordinates at a given time, and a separate derivative(t) function that calculates the slope at any given t. Because the derivative function needs to call the coordinates function, we package them together in a script object called “func”
script func
on derivative(t)
set coordAtTMinusDelta to my coord(t - 0.01)
set coordAtTPlusDelta to my coord(t + 0.01)
set dx to (x of coordAtTPlusDelta) - (x of coordAtTMinusDelta)
set dy to (y of coordAtTPlusDelta) - (y of coordAtTMinusDelta)
return {dx:dx, dy:dy}
end derivative
on coord(t)
set rad to (my sin(t)) * 100
set x to (my cos(3 * t)) * rad
set y to (my sin(3 * t)) * rad
return {x:x, y:y}
end coord
end script
Note that we’ve multiplied the x and the y by 100 to make the graph bigger for drawing.
Now, defining the path is done with a loop that makes 19 anchor points, and then uses the anchor points to make a path object:
tell application "SinterPixels"
set anchorData to {}
repeat with a from 0 to 18
set t to a * 3.14158 / 18.0
set nthPos to my func's coord(t)
set nthSlope to my func's derivative(t)
set anchorData to anchorData & { { position :{ x of nthPos , y of nthPos }, slope :{ deltax : dx of nthSlope , deltay : dy of nthSlope }}}
end repeat
set theDoc to make new document with properties {height:300, width:300}
tell theDoc
set thePath to make new path with properties {anchor data:anchorData, position:{0, 0}, line width:10, color:blue, fill color:{0.5, 0.5, 1.0, 0.2}}
end tell
end tell
-
Today's Coding Horror - Root Cause Analysis for a Scientific Journal Retraction
This is an interesting case of a journal article being retracted: retractionwatch.com , not just because the (incorrect) results seem to have been widely reported in the press, but also because of, well, read on.
Root Cause Analysis is often a matter of repeated asking the question “why did that happen?”. You get one answer which explains why that one thing happened, but prompts the next question. So in this case, let’s explore:
Why did the paper get retracted?
Because there was an error in the calculations.
Why was there an error in the calculations?
Because of programmer error classifying statistical populations in the study.
Why did programmer make an error classifying the populations?
Because the programming language and programming conventions produce unintelligible gibberish.
Why did programmer use gibberish-producing conventions and programming language?
Because reasons? Dear reader, judge for yourself if the closing bit of the article makes you scream in horror at 100% of what has led to this:
Here’s the original (mistaken) coding line:
replace event`i’ = 1 if delta_mct`i’ != 0 | spouse_delta_mct`i’ != 0
And here’s the corrected coding:
replace event`i’ = 1 if (delta_mct`i’ != 0 | spouse_delta_mct`i’ != 0) & delta_mct`i’ != . & spouse_delta_mct`i’ != .
-
SinterPixels Demos Part 5: A Tiling with Rotatable Square Tiles
My new app, SinterPixels, is in the App Store. For the fifth installment in the series of examples of what one can do with SinterPixels, I’ll show how simple it can be to use SinterPixels' “layer” object to make a tiling. Here’s what will be produced by a 19 line script:
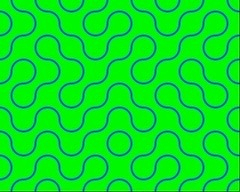
This image is a 8 by 10 array of tiles, each of which is a square 48 pixels. Each tile looks like this:
This is the script that makes this 48 by 48 pixel image in a document of its own, and makes a copy of its data in PNG format:
tell application "SinterPixels"
set tileDoc to make new document with properties {name:"Tile", height:48, width:48}
tell tileDoc
set color of every pixel to green
make new circle with properties {position:{24, 24}, radius:24, color:blue, fill color:clear, line width:4}
make new circle with properties {position:{-24, -24}, radius:24, color:blue, fill color:clear, line width:4}
set tilePNG to get PNG data
end tell
end tell
Then we make a second document for assembling the 80 tiles that will make the pattern:
tell application "SinterPixels"
set mosaicDoc to make new document with properties {name:"Mosaic", height:384, width:480}
end tell
Now we go through a double loop, 10 times horizontally for x, and 8 times vertically for y. Each time through the loop, the script makes a new layer with the PNG data we copied in the first step. A “layer” in SInterPixels might be different from the “layer” some might be familiar with from an app like Photoshop. In this case, the layer itself has a size of 48 by 48, and like any other shape, one can set its position and rotation. So, for each iteration, the tile (i.e., the layer) gets put in the right position, and, randomly, a rotation is applied.
tell application "SinterPixels"
b> new document with properties {name:"Mosaic", height:384, width:480}repeat with x from 1 to 10
repeat with y from 1 to 8
set newPosition to {(x * 48) - 264, (y * 48) - 216}
set newRotation to some item of {0, 90}
tell mosaicDoc
set nthLayer to make new layer with properties {image data:tilePNG, rotation:newRotation, position:newPosition}
end tell
end repeat
end repeat
end tell
Here’s the whole whole 19 line script that makes an image like the one at the top of this post.
tell application "SinterPixels"
set tileDoc to make new document with properties {name:"Tile", height:48, width:48}
tell tileDoc
set color of every pixel to green
make new circle with properties {position:{24, 24}, radius:24, color:blue, fill color:clear, line width:4}
make new circle with properties {position:{-24, -24}, radius:24, color:blue, fill color:clear, line width:4}
set tilePNG to get PNG data
end tell
set mosaicDoc to make new document with properties {name:"Mosaic", height:384, width:480}
repeat with x from 1 to 10
repeat with y from 1 to 8
set newPosition to {(x * 48) - 264, (y * 48) - 216}
set newRotation to some item of {0, 90}
tell mosaicDoc
set nthLayer to make new layer with properties {image data:tilePNG, rotation:newRotation, position:newPosition}
end tell
end repeat
end repeat
end tell
-
SinterPixels Demos Part 4: A Randomly Asymmetric Leaf
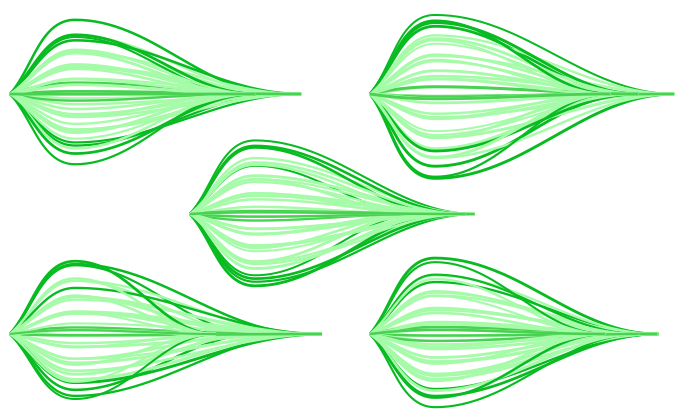
My new app, SinterPixels, is in the App Store. For the fourth installment in the series of examples of what one can do with SinterPixels, let’s revisit yesterday’s post, where we explored how to draw a simple, symmetric leaf. Today, we’ll expand on that simple leaf, and make it a bit more organic, by introducing some randomness in the parameters we use for drawing the lines.
First, lets introduce a function that gets a random number between -1.0 and 1.0:
to randomFraction()
return (random number from -100 to 100) / 100.0
end randomFraction
Next, lets write a function that makes the anchor data and color for a single line that we use to draw a leaf – we’ll draw 11 of these
to leafPath(tip, px, py, slp, col)
using terms from application "SinterPixels"
set p1 to {position:{0, 0}, slope:slp}
set p2 to {position:{px, py}, slope:0}
set p3 to {position:{tip, 0}, slope:0}
return {pts:{p1, p2, p3}, clr:col}
end using terms from
end leafPath
When we call this function, we pass in 5 values. tip is the length of the leaf, in pixels. px is x value at the highest (or lowest) point on the arc – where the slope of the path is zero. py is the y coordinate at that point. slp is the slope of the line where the path begins, on the left. and col is the color. This function returns the basic information needed to draw a single path, of which we’ll draw 11 to make a leaf shape.
Now, let’s write a function that will generate all 11 of our paths for a leaf. This function will need a bit more info. The tip and px values are the same as in the previous function. But now, the topmost and the bottommost paths will have different values, a py (positive y) value and a ny (negative y) value. Yesterday, in our symmetric leaf, py and ny were both just the same as px. And, we need two slopes, one for the top path (pSlp) and one for the bottom path (nSlp) . Yesterday, the slopes were 1 and -1, which made things simple:
to allLeafPaths(tip, px, py, ny, pslp, nSlp)
set topLeafPath to leafPath(tip, px, py, pslp, {0.1, 0.7, 0.1})
set bottomLeafPath to leafPath(tip, px, ny, nSlp, {0.1, 0.7, 0.1})
set centerLeafPath to leafPath(tip, px, (ny + py) / 2, pslp + nSlp, {0.25, 0.8, 0.25})
set allPaths to {topLeafPath, centerLeafPath, bottomLeafPath}
repeat with n in {1, 2, 3, 4, 6, 7, 8, 9}
set m to 10 - n
set minorPath to leafPath(tip, px, (n * ny + m * py) / 10, (m * pslp + n * nSlp) / 10, {0.6, 1.9, 0.6})
set allPaths to allPaths & {minorPath}
end repeat
return allPaths
end allLeafPaths
Here, we make three paths special – the top, center and bottom paths. Then, in the loop, we create eight paths evenly spaced between them – four between top and center, four between center and bottom.
Next, we need a function that will call into that allLeafPaths() function, supplying values with a little bit of randomness tossed in. Here’s how we do that:
to leafPathsWithRandomParams(sz)
set quarterSize to sz * 0.25
set dpy to quarterSize * 0.3 * (my randomFraction())
set dny to quarterSize * 0.3 * (my randomFraction())
set dx to quarterSize * (my randomFraction())
set py to dpy + quarterSize
set ny to dny - quarterSize
set tip to sz + dx
set pSlope to py / quarterSize
set nSlope to ny / quarterSize
return my allLeafPaths(tip, quarterSize, py, ny, pSlope, nSlope)
end leafPathsWithRandomParams
The three values, dpy, dny and dx are ‘delta’ values – that’s how much we are going to change the path anchor positions by. The two slope values are set based on the randomized py and ny values.
And, almost at the end, we write a function that actually calls leafPathsWithRandomParams() and draws the paths. This function draws all the paths at the position specified
to makeALeaf(pos)
tell application "SinterPixels"
tell document 1
set myPaths to my leafPathsWithRandomParams(260)
repeat with nthPath in myPaths
make new path with properties {position:pos, anchor data:pts of nthPath, closed:false, fill color:clear, color:clr of nthPath}
end repeat
end tell
end tell
end makeALeaf
Now, to show off that each leaf is its own special someone, lets draw five of them, each at a different position, and see how they differ:
makeALeaf({-340, 120})
makeALeaf({20, 120})
makeALeaf({-160, 0})
makeALeaf({-340, -120})
makeALeaf({20, -120})
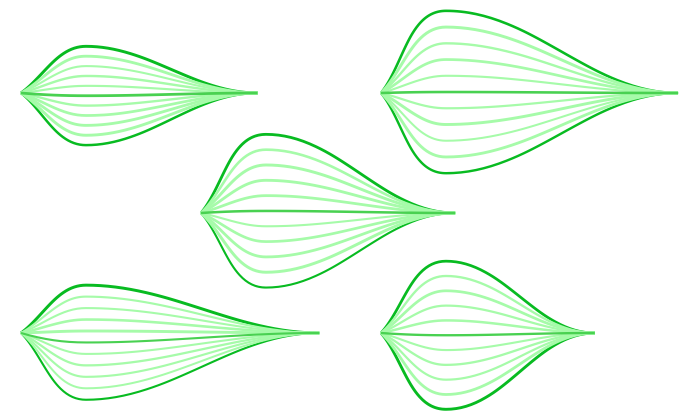
To generate the image like the one at the top of this post, just run that in a loop 5 times:
repeat 5 times
makeALeaf({-340, 120})
makeALeaf({20, 120})
makeALeaf({-160, 0})
makeALeaf({-340, -120})
makeALeaf({20, -120})
end repeat
-
SinterPixels Demos Part 3: A Leaf
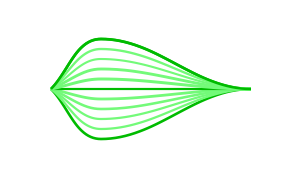
My new app, SinterPixels, is in the App Store. For the third installment in the series of examples of what one can do with SinterPixels, I’ll go through what’s required to make this leaf.
A basic shape in SinterPixels is the path. This image is just eleven paths. Each path is composed of path anchors – a line, specifically a bezier path, is drawn to connect the anchors. In SinterPixels, each of the anchors can be specified by a position and a slope. The upper edge of the leaf is a single path, which we can make like this:
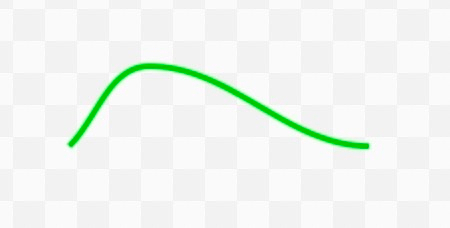
tell document 1 of application "SinterPixels"
set p1 to {position:{0, 0}, slope:1}
set p2 to {position:{50, 50}, slope:0}
set p3 to {position:{200, 0}, slope:0}
make new path with properties {position:{-100, 0}, anchor data:{p1, p2, p3}, closed:false, fill color:clear, color:{0, 0.7, 0}}
end tell
In this script, we are making a path with three anchor points -- the first one, on the left, has a slope of 1. The second one, at the top of the curve, has a slope of zero. The third one, at the right, also has a slope of zero.To make the leaf, we’ll draw a similar path 11 times. The script goes through a loop from 5 to -5, and makes a new path each time through the loop. For each path, we change the slope at the first point and the position of the second point, and for the first, last and middle paths, we’ll draw the path in a darker color.
tell document 1 of application "SinterPixels"
set p3 to {position:{200, 0}, slope:0}
repeat with n from -5 to 5
set p1 to {position:{0, 0}, slope:n / 5}
set p2 to {position:{50, n * 10}, slope:0}
if n is in {-5, 0, 5} then
set col to {0, 0.7, 0}
else
set col to {0.4, 1.0, 0.4}
end if
make new path with properties {position:{-100, 0}, anchor data:{p1, p2, p3}, closed:false, fill color:clear, color:col}
end repeat
end tell
And that makes the image at the top of the post.
For the next installment, we’ll tweak this script just a little bit, so that it generates a slightly different leaf every time. I hope you check out SinterPixels in the app store, or look at all the user documentation at the SinterPixels User Docs Github
-
SinterPixels Demos, Part 2: A Gear Shape
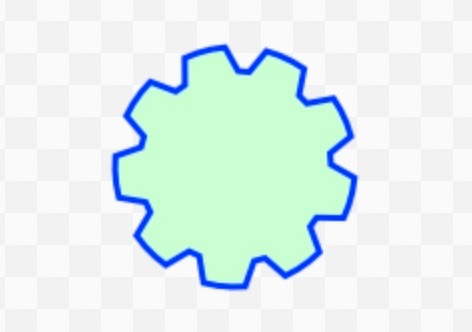
My new app, SinterPIxels, is in the App Store. For the second installment in the series of examples of what one can do with SinterPixels, I’ll go through what’s required to make this gear shape.
One of the basic shapes in SinterPixels is the polygon. This gear is just a polygon, where the outer edge is roughly a circle, but with notches for each tooth.
A polygon can be defined by a sequence of radii, so for example, the sequence {50, 50, 50} just creates a triangle, three points each with a radius from the center of 50:
tell application "SinterPixels"
tell document 1
make new polygon with properties {radii:{50, 50, 50}}
end tell
end tell
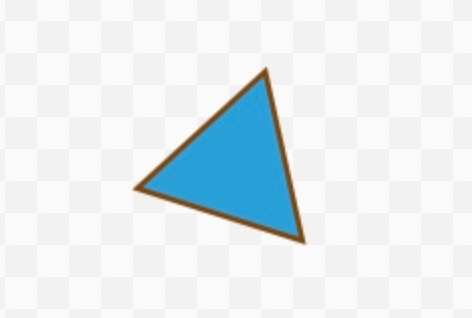
If we use 15 vertexes, and alter the radii with the pattern “long, long, short”, it produces an asterisk:
tell application "SinterPixels"
tell document 1
make new polygon with properties {radii:{50, 50, 20, 50, 50, 20, 50, 50, 20, 50, 50, 20, 50, 50, 20}, position:{0, 0}}
end tell
end tell
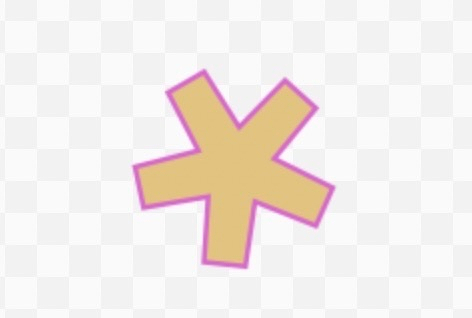
Let’s extend that idea to make our gear, but to generate the list of radii, lets write a helper function that takes in a number of teeth, a radius and a tooth depth
to gearRadii(numberOfTeeth, rad, depth)
set rList to {}
repeat with s from 1 to numberOfTeeth
set rList to rList & {rad, rad, rad, rad}
set rList to rList & {(rad - depth), (rad - depth)}
end repeat
return rList
end gearRadii
Now, our script can get a list of radii for lots of different gears, and just make a polygon. Lihe the circles in our previous demo, polygons have color, fill color, and line width properties, so we can set exactly the colors we want:set radiiList to my gearRadii(9, 60, 12)
tell application "SinterPixels"
tell document 1
make new polygon with properties {radii:radiiList, color:blue, fill color:{0.8, 1.0, 0.8}, line width:3}
end tell
end tell
This script generates the shape at the top of the post!Hope you try our SinterPIxels on the App Store, and check out all the user documentation at the github repo.
-
SinterPixels Demos, Part 1: Growing Circles Movie
I have a new app in the App Store: SinterPIxels For the next few weeks, I’ll be writing posts with examples of what SinterPixels can do. Today is the first installment in the series: How to generate this movie:
Note: for some reason there's a gray overlay on the video player which I can't figure out. Here's a link to the generated .mov file
SinterPixels is all about writing a script to generate graphics. So for example, a new circle can be generated with:
make new circle
circles have properties like color, fill color, line width and radius, so these can be specified when you make one like this:
make new circle with properties { color: blue, fill color: clear, line width: 3, radius 20}
That will make a blue circle with no fill color of radius 20 with a line width of 3, If you don’t specify one of the properties, a random one will get used.
To make a circle grow just a little bit, we can get the previous radius and set it to a slightly larger value:
set oldRadius to (get radius of the first circle)
set the radius of the first circle to oldRadius + 1
One of the features of SinterPixels is the ability to record movies. There are custom commands start, record movie frame, and stop that define each frame precisely. When you stop filming, you can specify where to save the file and a filename.
Combining all these in a single script can result in this movie which shows circles growing and disappearing:
Here’s the complete 22 line script to generate this movie:
tell application "SinterPixels"
set theDoc to make new document with properties {width:480, height:320}
start filming of document 1
repeat 30 times
tell document 1
make new circle with properties {line width:4, fill color:clear}
set circleCount to count circles
repeat with c from circleCount to 1 by -1
set oldr to get radius of circle c
set radius of circle c to oldr + 1
set oldlw to line width of circle c
if oldlw is less than 0.5 then
delete circle c
else
set line width of circle c to (oldlw - 0.5)
end if
end repeat
record movie frame duration 2
end tell
end repeat
stop filming of document 1 saving in documents folder filename "Demo.mov"
end tell
For more examples and complete user documentation, see this link: SinterPixels UserDoocs Github
-
SinterPixels in the App Store
Big news today – my macOS scriptable app in on the App Store. It’s called SinterPixels.

The app icon is itself made in SinterPixels, and as an introduction to what the app does, here’s the script which makes it:
to newSquare(doca, len, pos)
tell application "SinterPixels"
tell doca
make new polygon with properties {radius:len / 1.414, position:pos, line width:0, fill color:white, rotation:45, vertex count:4}
end tell
end tell
end newSquare
to newCircle(doca, rad, pos)
tell application "SinterPixels"
tell doca
set newC to make new circle with properties {radius:rad, position:pos, line width:0, fill color:white}
end tell
end tell
return newC
end newCircle
to makeIconBackground()
my newSquare(iconDoc, 512, {256, 0})
my newSquare(iconDoc, 512, {-256, 0})
my newSquare(iconDoc, 512, {0, 256})
my newSquare(iconDoc, 512, {0, -256})
my newCircle(iconDoc, 256, {256, -256})
my newCircle(iconDoc, 256, {-256, -256})
my newCircle(iconDoc, 256, {256, 256})
my newCircle(iconDoc, 256, {-256, 256})
end makeIconBackground
tell application "SinterPixels"
close every document without saving
set iconDoc to make new document with properties {height:1024, width:1024}
my makeIconBackground()
tell iconDoc
set pPoly to make new polygon with properties {position:{0, 0}, vertex:{{-216, -472}, {394, -472}, {512, 150}, {-98, 150}}, fill color:{1.0, 0.29, 0.29}, line width:0}
end tell
set sCirc to my newCircle(iconDoc, 380, {-130, 110})
set fill color of sCirc to {0.31, 0.31, 0.93}
set sCirc to my newCircle(iconDoc, 200, {220, -220})
set fill color of sCirc to {1.0, 0.29, 0.29}
tell iconDoc
set sText to make new text shape with properties {position:{-124, 80}, fill color:black, line width:0, font:"Helvetica", bold:true, text content:"S", font size:542}
set pText to make new text shape with properties {position:{140, -91}, fill color:black, line width:0, font:"Helvetica", bold:true, italic:true, text content:"p", font size:542}
end tell
end tell
-
Karaoke videos
I am having a lot of fun making demos for my soon-to-be-released scriptable drawing app. Here’s a video that’s the output from a ~200 line AppleScript – its the lyrics for “Take me out to the ball game” in Karaoke format:
-
A Scriptable Drawing app
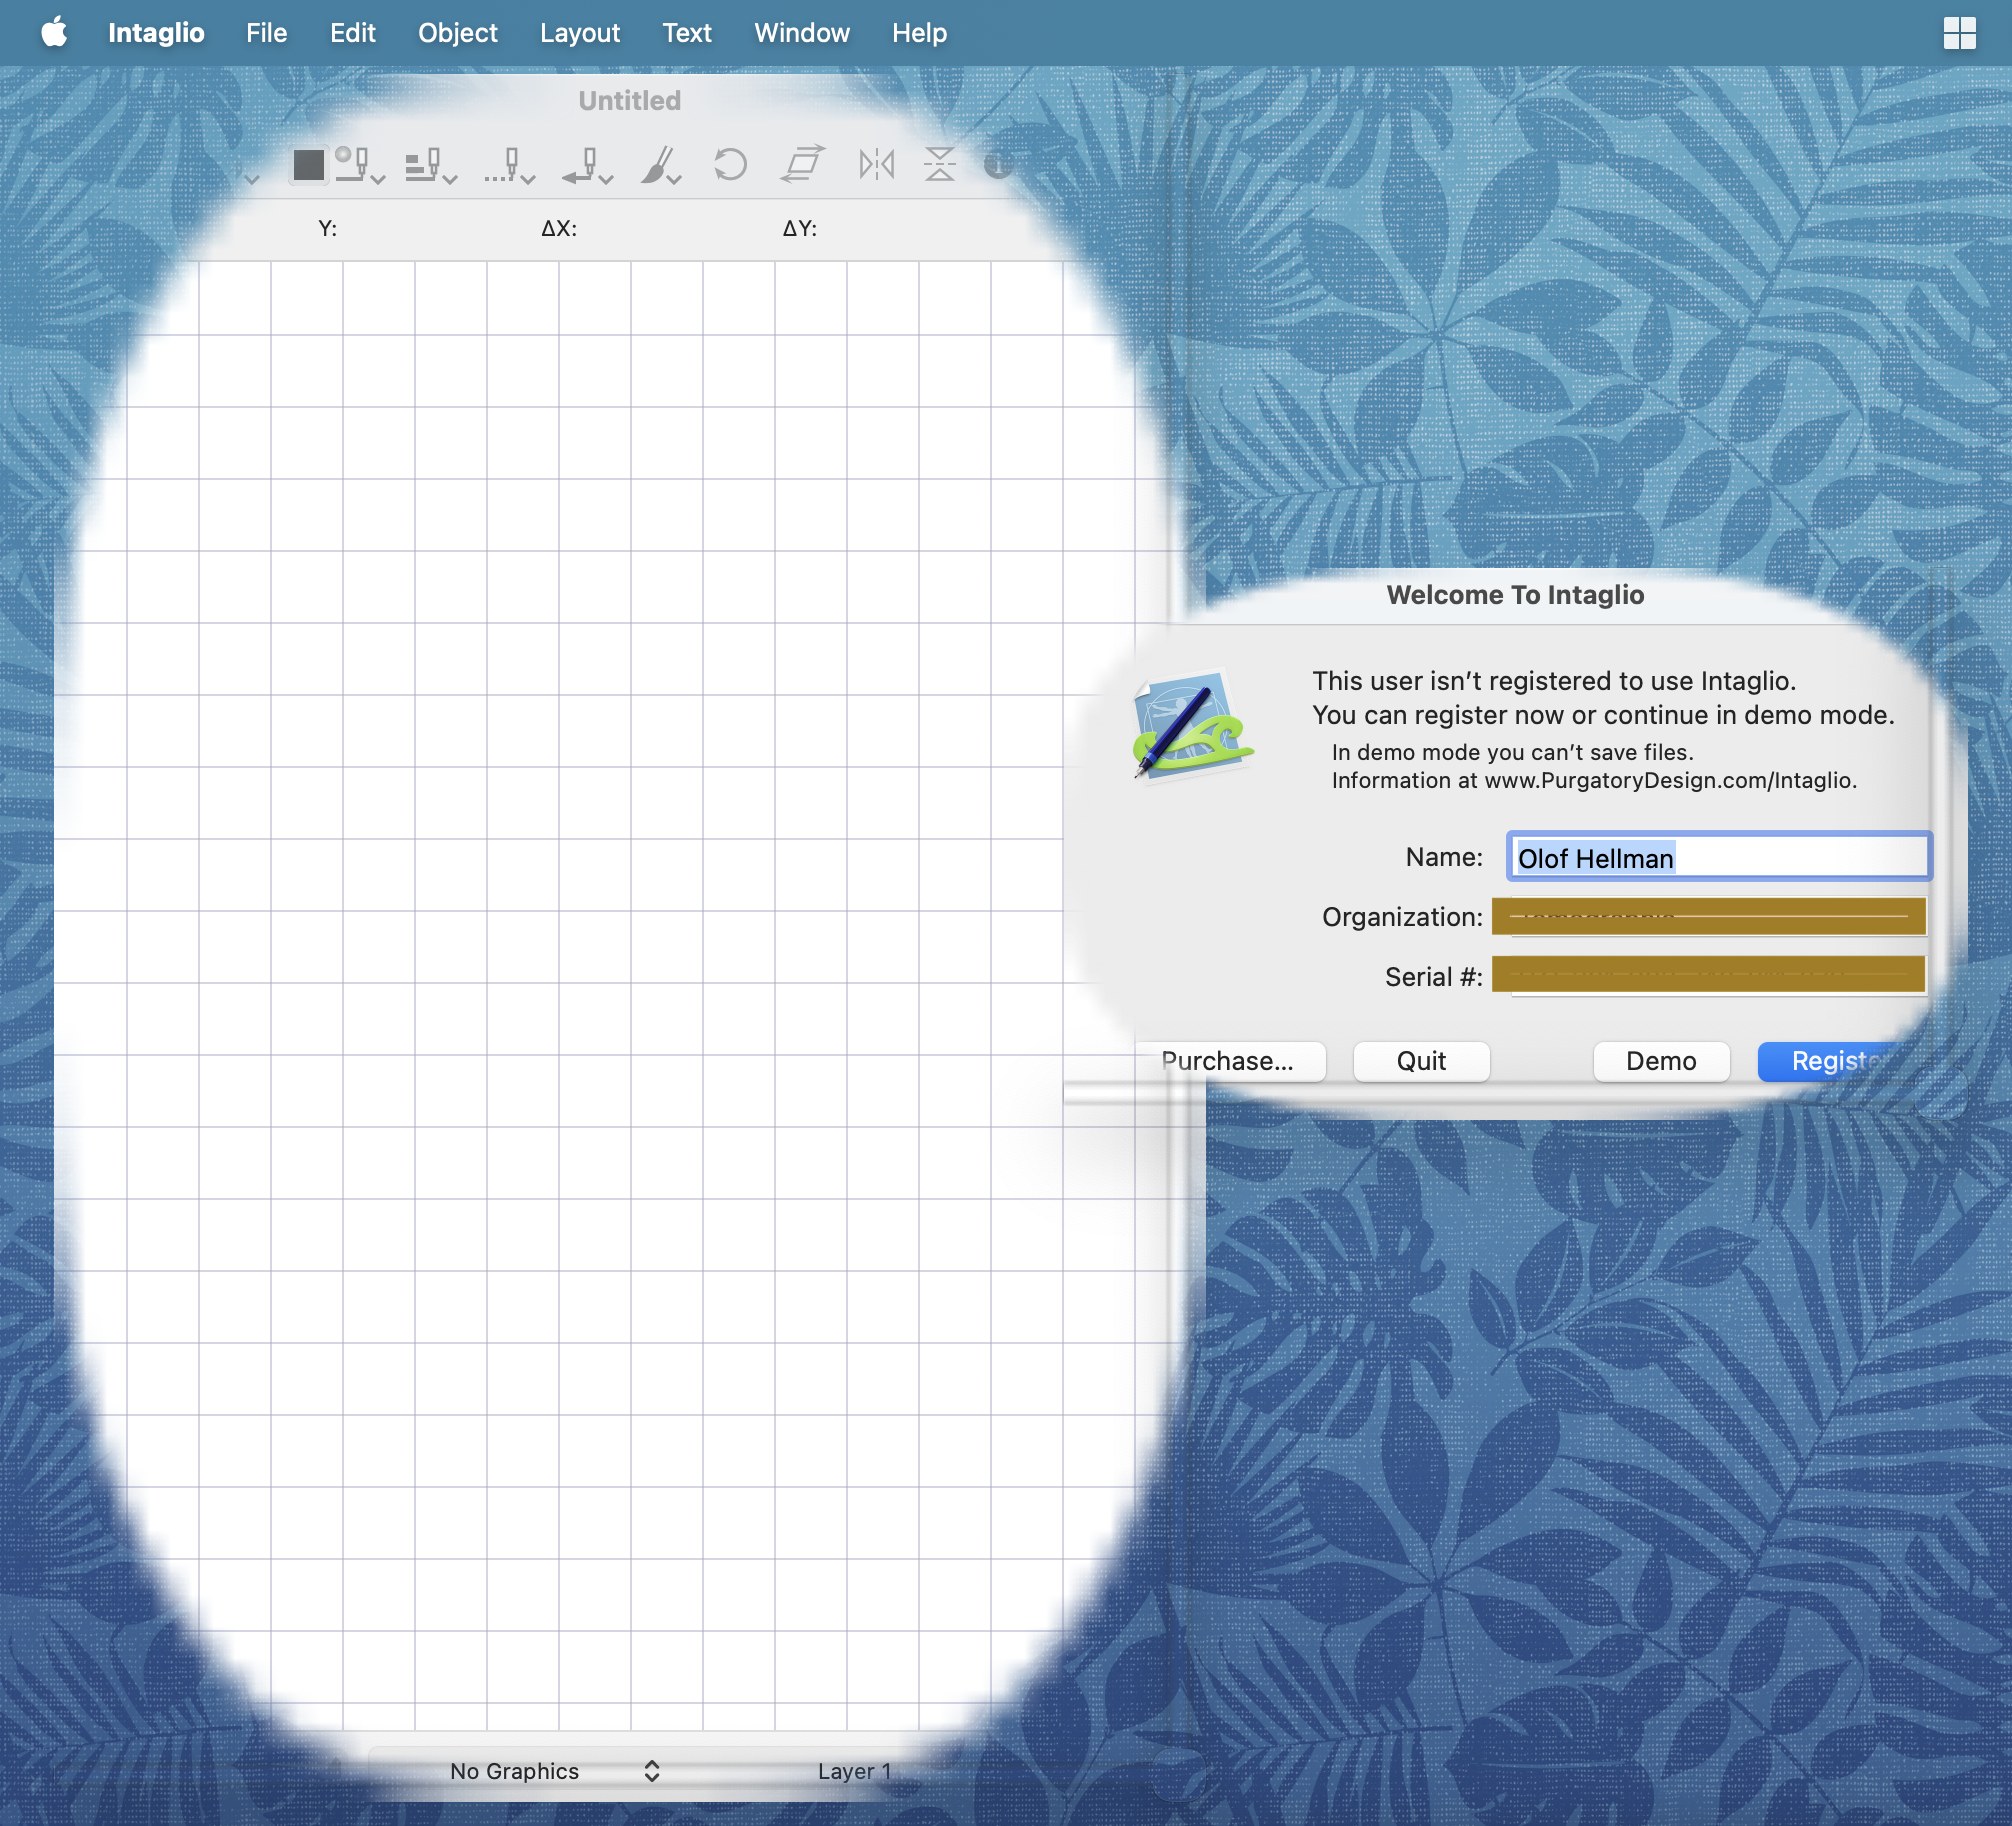
For many years, the most flexible scriptable drawing app was Intaglio, but it hasn’t been kept up.
Launching it for the first time in a while, it is showing its age:
And speaking of scriptable drawing apps, stay tuned…
-
Engineering the Arts
There’s some deep comedy imagining the software engineering process as applied to art or music or writing. Would an artist publish a draft of a new painting on GitHub and open it up to pull requests from the community? Would a fiction writer begin a new project by first writing the unit tests that the new novel needs to pass? Would a musician develop a battery of A/B tests on an album and ship “remastered” versions every two weeks? If you find these ideas absurd, it’s interesting to ponder why that is. And if you don’t find these ideas absurd, it’s a wonder why anyone would want to read your poetry / listen to your music / see your art.
This is a post about AI.
-
Silly Lightning Talk
Years ago I did a talk at Seattle Xcoders regarding variable naming and Noun Piles. After years of procrastination, here’s a cleaned up version of that talk:
-
AppleEvent Manager does not respect the kAEDontExecute flag of NSAppleEventDescriptor.SendOptions:
[UPDATE: I can’t reproduce this in a sample app, so the .dontExecute flag is sometimes respected, but something my app is doing is making things strange]
This is FB21695413:
My AppleScriptable macOS app is recordable. Occasionally, I have a UI action performed by the user that I handle internally, and I send a corresponding AppleEvent with the SendOptions flag .dontExecute (was kAEDontExecute) so that AppleScript recording will see the action and record it.
With Sequoia 15.7.3 and Tahoe 26.1, I am seeing events sent with the .dontExecute flag delivered back to the application invoking the appropriate AppleEvent handler AS IF the .dontExecute flag was not specified.
For example, if in my app the user does an action to create a new ‘widget’, I send an apple event of the form
make new widget at end of document 1with the .dontExecute option, but, the AppleEvent handler installed for core/crel gets called anyway, and as a result, 2 widgets get made.
I expect (and previously the behavior was) that if I specify .dontExecute, the AppleEvent will be forwarded to any registered recording agents, but not actually delivered to the app itself.
For the expected behavior, see Inside Macintosh: Interapplication Communication / Chapter 9 - Recording Apple Events / Factoring Your Application for Recording “Sending Apple Events Without Executing Them”
-
New Band discovery: Athena
This week’s music discovery: Athena, a Turkish ska/punk/polka-ish band
Their sound reminds me of Brave Combo’s “The Process” mixed with a little The Budos Band. Here’s the song that got me hooked: Yaşamak Var Ya
-
Sinterapt update
An update on Sinterapt, my APT data analysis app.
It’s at the point where it is ready to Beta test in TestFlight. Let me know if this kind of thing interests you, and I’ll add you to the TestFlight list.
An example of the kind of thing I’m working on now: I’ve just today hooked up UI elements to the “cylinder” and “plane” geometries to control their radius or thickness properties, and the UI gives real-time feedback. Here’s an example of the cylinder element and the real time feedback shown in the graphics window and the 1D profile:
-
America has always been screwed up
Sometimes the news is overwhelming and awful and directs me towards just checking out entirely, but a salve comes from an unexpected place and reminds me that things have always been terrible and today is not an aberration, and oddly, the knowledge that America has always been screwed up gives me a sort of vaccine to today’s sickness.
For whatever reason, two weeks ago, the town of Grimsby (Lincolnshire, England) came up in conversation with my family, and I offhandedly remembered that Elton John had a song about Grimsby on his album Caribou (1976), and today I decided to listen to the album while I was coding. Dang if one of the album tracks, “Ticking”, isn’t about a gun nut going berserk in the USA and leaving death in his wake.
And immediately, a litany of songs of senseless violence sprang to mind. Boomtown Rats’ “I Don’t Like Mondays” (1979). 10000 Maniacs’ “Jubilee” (1989)…. (perhaps you have your own memory to add to the list — please comment if you do).
I am conflicted to see in retrospect how I grew up in a stew of senseless violence and internalized it all as just another part of being American.
Fuck that.
subscribe via RSS